Modernize your slope angle assessment
Slope Angle is Key
If you have taken a level 1 avalanche course, or if you have even lightly perused any book about traveling in avalanche terrain (such as the ever popular Staying Alive in Avalanche Terrain) you know that a slope's incline is a key factor to asses when choosing where to ski on any given avalanche-prone day. If you ski or ride in a place like Colorado, where persistent weak layers linger throughout the year and you can't really avoid it through other means, you know that assessing slope angle is generally the MOST important factor to consider when selecting where you want to go. If we are at all in doubt about a day's snow stability, we can simply ski terrain less than about 30 degrees and minimize our risk to the avalanche hazard. In order to do that though, we have to be able to recognize terrain of that steepness.

More data clearly illustrating that under 30 degrees pretty much means eliminating the threat of avalanches. Data from Montana. (Source: https://www.mtavalanche.com/sites/default/files/MSA_Slope_Angle_Final.pdf)

A study perfomed in Switzerland. This steepness data comes from measured slope angles from the steepest part of the bed surface that is 10 x 10 meters in size. In maritime climates, the steepness is a little greater. (source: https://utahavalanchecenter.org/blog-steepness)
How do we assess a piece of terrain's slope angle?
There are several ways to measure a slope's angle. Most often taught in AIARE avalanche courses is the method of using an inclonometer of some form, in the field, while looking directly at the slope in question, or while standing directly on the slope in question. You cannot get an accurate measurement by either looking up a slope or down a slope. See pictures below for good overview of these techniques.

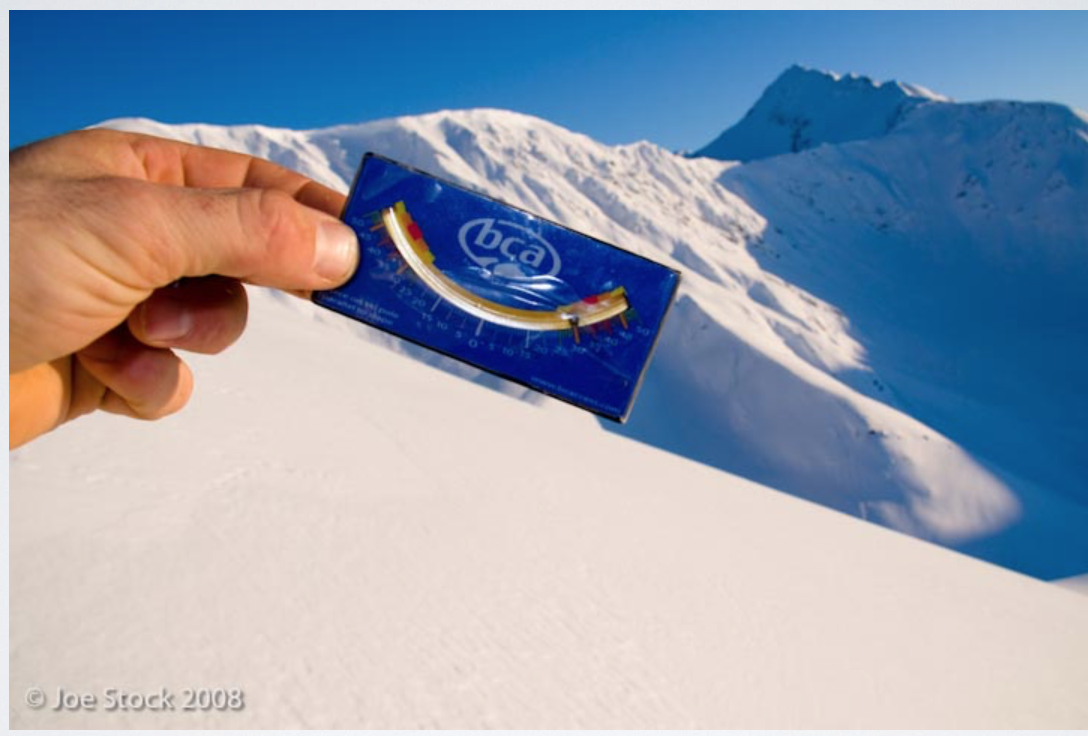

These techniques have obviously huge flaws and drawbacks. If you are measuring the angle while standing on the slope, then its obviously not a helpful decision making tool since you have already committed to exposing yourself to that specific terrain. Measuring the profile view, as shown above, is a bit better of a technique (at least you don't have to fully commit to the terrain before measuring). Its possible sometimes to do this from afar and get a relatively accurate measurement. However, its quite hard to have high confidence in the fact that you are measuring the steepest part of the slope (which it should be obvious, is what we are most interested in). The slope you are measuring via its profile, could very well get steeper above or below, and its often times hard to tell. In addition, it is also sometimes simply difficult or impractical to get a profile view.
Modernize your slope angle assessment!
So, what is the solution then? Forgo the inclonometer and start utilizing the great access to all of the geographical data available to you ahead of time! What I'm talking about is utilizing Geographical Information Systems and data analysis to know with relatively good accuracy, just how steep a piece of terrain is before you even leave your living room. Lucky for all of us, we don't need a deep understanding of GIS or any sort of specialized tools to do this - we are all lucky enough to be backcountry skiing in the age of data and information democratization! There are quite a few map websites and apps that let you use slope angle shading tools to calculate the slope angle on any given piece of terrain. What these data analysis tools produce, is a great rendering of the terrains slope angle, visualized by color shading. My favorite 3 that allow this type of visualization are as follows:
1. www.Caltopo.com
Caltopo is my go to backcountry skiing planning tool. Its bandwidth for complexity, yet the ability to keep it super simple and intuitive make this a great tool. Caltopo's depth would require multiple blog posts focusing on it alone to cover everything you can do with this free website. However to get you started, all you need to know is this: Navigate to where you want to go skiing on the map interface. Click "Slope Angle Shading" in the left hand column. Boom, there you are. Now you know where the low angle terrain is, and where the steep terrain is based on the key in the upper right hand corner of your screen. Here is an example of a map I recently built on a trip to Marble in central Colorado utilizing a custom slope angle shading:

Slope angle shading makes it quite easy to plan your route to avoid certain steep sections, and to get a big picture overview of what type of terrain is above you or directly connected to you. In this map I have green shading representing 20-26 degree terrain, yellow 27-29, Orange 32-34, red 35-45, and purple and black steeper then that. White is terrain less than 20 degrees steep.
2. www.fatmap.com
Fatmap is an application that I first started to use when I was skiing around Chamonix last year. It is definitely the future of mapping, and will undoubtably soon render all other mapping applications obsolete. Why is this? Well picture google earth with a ton more detail. In addition to that, it allows for easy slope angle shading, so you can know where the steep rollovers are and where the low angle well supported planar pow runs are. The real limitation of Fatmap right now is that its limited where it is useful. Their locations are always growing though, and I'm sure soon they'll have maps just about anywhere you're trying to recreate. Check out a screen shot of their slope angle shading:

The future of backcountry navigation. Takes all the fun out of it! But keeps you safe and efficient.

Same 3d image, with slope angle overlay. yellow is 30-35, red is 35 and up!
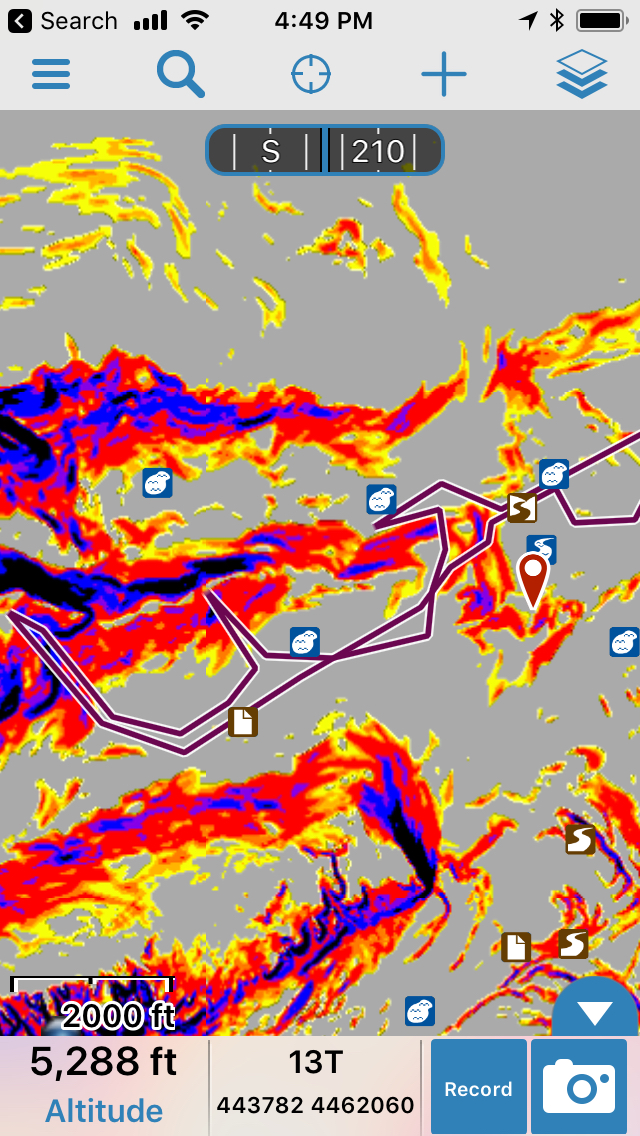
3. www.gaiagps.com
Gaia offers very similar slope angle shading as Caltopo, the difference is that Gaia is predominately an app for mobile devices. I use this sometimes, though I usually prefer to make a map in Caltopo and then export the same map in Avenza (another map app), however this is bit more complicated than just using Gaia. That being said, I do prefer the other GPS utilities of Gaia and it generally is my go to GPS app. To get the slope angle shading to overlay on a top map (to make more sense of if) you need to pay up for the pro subscription. See the picture for a screen shot from an iPhone of Gaia's slope angle shading without the pro subscription:
Using slope angle shading as a decision making tool
These slope angle shading algorithms are based off of geographical data sets known as a Digital Elevation Models (DEM). That means that they are not interpolating between topographical lines. What that means is that they can actually be much more precise than topo lines. Some DEM data sets are as precise as 1 meter grid cells and some are much less precise than that. We can be confident though, that these tools gives a pretty good idea of how steep a slope is before you commit to it. These visualizations may average out some small steep rollovers or start zones and portray them as lower angle than they actually are, or steeper than they actually are, so you still need to keep your eyes open. Generally though, I know before I go out whether or not I'm going to ski terrain steeper than 30 degrees or not, and so I use these tools to select and verify that terrain with a much higher level of precision and confidence than any other method available these days. Now, go forth, slope angle shade, ski pow, and stay safe!

Use slope angle shading to identify and eliminate the terrain that is too steep for the day's conditions. Then ski the lower angle, well supported, pow!